I made a Vegan Chocolate Pastry Cream that holds its shape when piped, is rich without being sickly sweet and will make you rethink every filling you’ve ever used.
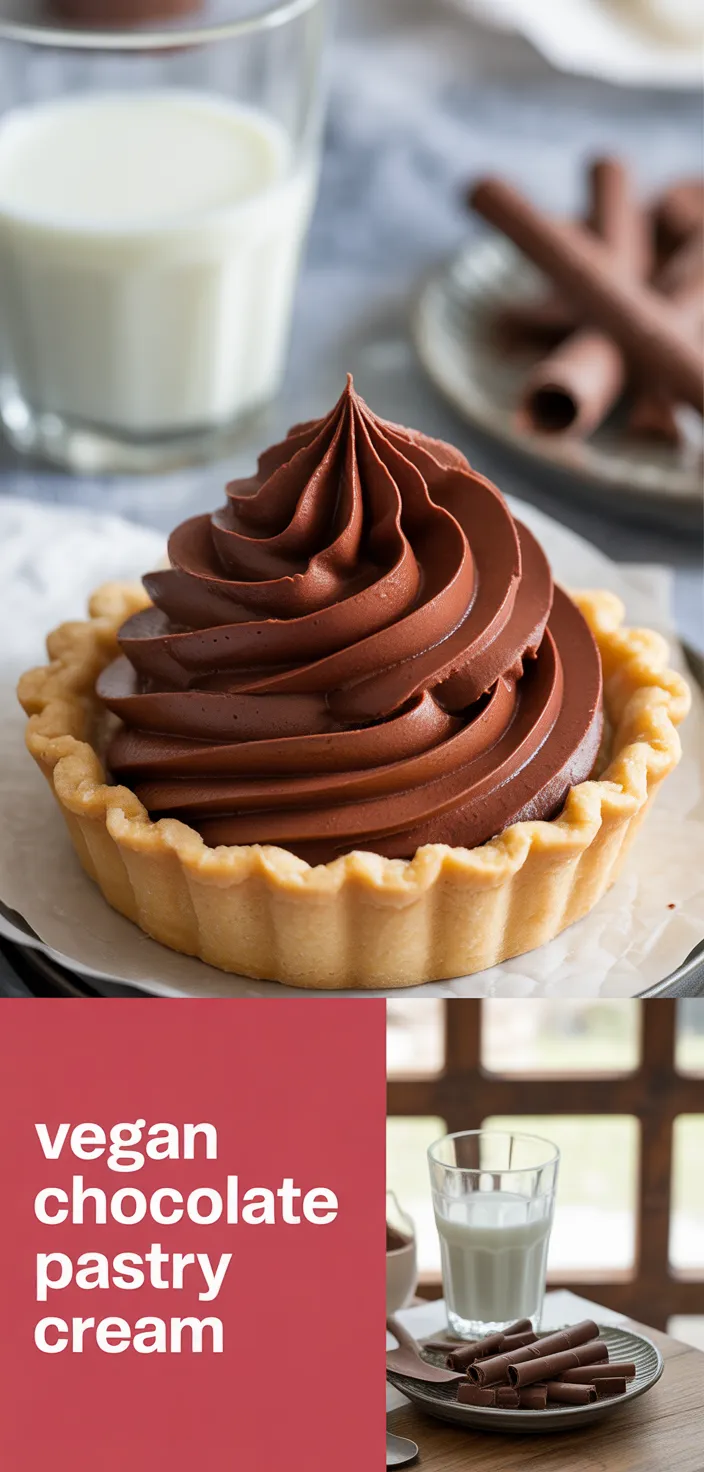
I absolutely adore this Vegan Chocolate Pastry Cream. I truly savor every single spoonful.
I love that it’s rich and not too sweet, exactly the kind of Vegan Chocolate Pastry Cream I crave after a long day. I’m obsessed with how it works in doughnuts, tarts, whatever.
I get a little giddy over the deep chocolate from cocoa powder and the silky body from unsweetened soy milk. But it’s not fussy.
It pipes, it holds, it tastes grown-up. Seriously, if you want one of the Best Non Dairy Desserts, this is the one I keep returning to.
No regrets ever.
Ingredients
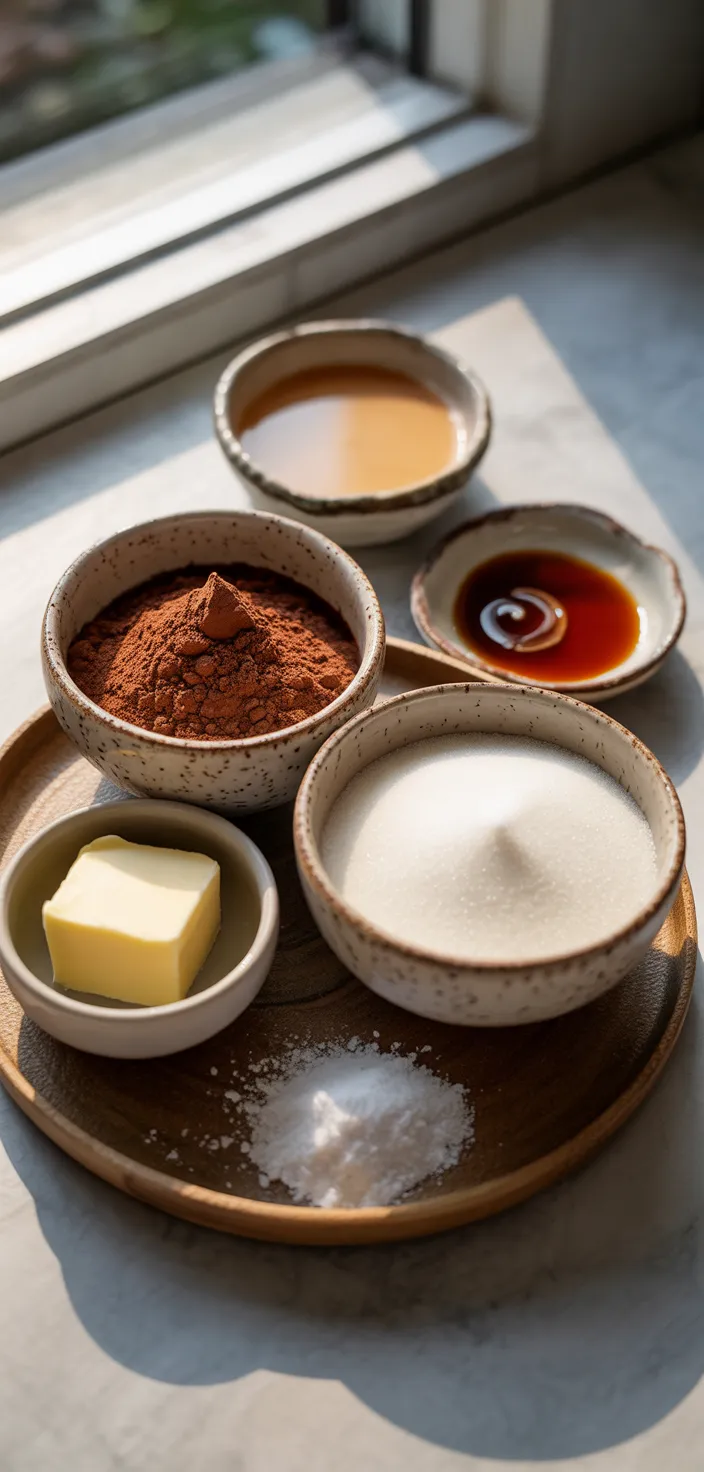
- Basically soy milk gives the creamy, dairy-free body you’ll want in pastry cream.
- Plus sugar sweetens without fuss and balances the cocoa’s bitterness, keeps it cozy.
- Cornstarch makes it thick and scoopable, no eggs needed, it’s magic.
- Basically cocoa powder gives chocolate punch, rich color and that familiar snap.
- Vegan butter adds silkiness and sheen, gives that melt in mouth finish.
- Vanilla extract rounds the chocolate, smells warm, makes it taste homemade.
- Basically fine sea salt sharpens sweetness, keeps it from tasting flat.
Ingredient Quantities
- 2 cups unsweetened soy milk
- 1/3 cup granulated sugar
- 1/4 cup cornstarch
- 1/4 cup unsweetened cocoa powder
- 2 tablespoons vegan butter
- 1 teaspoon vanilla extract
- 1/8 teaspoon fine sea salt
How to Make this
1. In a medium bowl whisk together 1/3 cup granulated sugar, 1/4 cup cornstarch, 1/4 cup unsweetened cocoa powder and 1/8 teaspoon fine sea salt until no lumps remain.
2. Pour 2 cups unsweetened soy milk into a saucepan and warm over medium heat just until it starts to steam and small bubbles form around the edge, don’t let it boil.
3. Slowly pour about a quarter of the hot soy milk into the dry mix while whisking constantly to make a smooth slurry, then whisk in another quarter. This tempers the starch so it won’t clump.
4. Pour the slurry back into the saucepan with the remaining milk and return to medium heat. Whisk constantly, scraping the bottom and edges, until the mixture thickens and comes to a gentle simmer, about 1 to 2 minutes once it starts bubbling.
5. Keep whisking for 30 to 60 seconds after simmering so the cornstarch cooks through and the cream becomes glossy and smooth. If you see any tiny lumps, press the mixture through a fine mesh sieve right away.
6. Remove from heat and stir in 2 tablespoons vegan butter and 1 teaspoon vanilla extract until fully melted and incorporated. Taste and adjust salt if needed.
7. Transfer the pastry cream to a bowl and press plastic wrap directly onto the surface to stop a skin forming. If you want to cool it fast, spread it into a shallow pan then cover.
8. Chill in the refrigerator at least 1 hour until firm enough to pipe. For quicker use you can cool in the fridge 30 minutes and briefly whisk before piping to loosen.
9. To use, whip briefly with a whisk or electric mixer for 10 to 20 seconds to restore silkiness, then pipe or spoon into tarts, cakes, doughnuts or pies. It holds its shape well when piped.
10. Leftovers keep covered in the fridge for up to 4 days. If it thickens too much, stir in a tablespoon of soy milk at a time to loosen before using.
Equipment Needed
1. Medium mixing bowl — to whisk the dry ingredients (and yeah, it can be a little scratched up)
2. Measuring cups and spoons — for the soy milk, sugar, cornstarch, cocoa, butter, vanilla and salt
3. Whisk — a good one, you’ll be using it a lot so don’t grab a flimsy one
4. Medium saucepan — for warming the milk and cooking the cream
5. Heatproof spatula or wooden spoon — for scraping the bottom and edges while whisking
6. Fine mesh sieve — to press the cream through if any tiny lumps show up
7. Plastic wrap or cling film — to press right onto the surface so a skin doesn’t form
8. Shallow pan or baking dish — optional but great for quick cooling
9. Electric hand mixer or hand whisk — for a quick 10–20 second whip before piping
10. Piping bag and tip or spoon — to fill tarts, donuts, pies or whatever you’re using it on
FAQ
Vegan Chocolate Pastry Cream Recipe Substitutions and Variations
- Soy milk: use oat milk or almond milk for a milder flavor, or canned light coconut milk for extra creaminess (if using coconut, thin with a little water so it’s not too thick).
- Granulated sugar: swap with coconut sugar for a deeper caramel note, or use maple syrup (reduce liquid elsewhere by about 2 tbsp if you use syrup).
- Cornstarch: substitute arrowroot powder or tapioca starch in a 1:1 ratio, but heat gently since arrowroot can get stringy if overcooked.
- Vegan butter: replace with refined coconut oil or a neutral vegan margarine; coconut oil firms when cool so fold quickly if you want a silky texture.
Pro Tips
– Warm the soy milk gently and keep an eye on it, if it gets too hot you can end up with a scorched flavor, so pull it off right when tiny bubbles form around the edge, not when it’s boiling.
– When tempering the dry mix, whisk like crazy and add the hot milk slowly, or else you’ll get lumps. If lumps still show up, press the whole thing through a fine mesh right away, it fixes more than you’d think.
– For extra glossy, silky texture, cook it an extra 20 to 30 seconds after it first simmers so the cornstarch fully activates, but don’t overcook or it will get gluey. If it gets too thick after chilling, stir in soy milk a tablespoon at a time until it loosens.
– Use room temperature vegan butter so it melts into the hot cream faster and mixes more evenly. And taste at the end, a pinch more salt can really make the chocolate pop.
– To cool fast and avoid skin, spread into a shallow pan and press plastic right on the surface, or put a piece of parchment on top then cover. If you need to use it sooner, cool 30 minutes then whisk briskly to bring back the silkiness.
Vegan Chocolate Pastry Cream Recipe
I made a Vegan Chocolate Pastry Cream that holds its shape when piped, is rich without being sickly sweet and will make you rethink every filling you’ve ever used.
4
servings
204
kcal
Equipment: 1. Medium mixing bowl — to whisk the dry ingredients (and yeah, it can be a little scratched up)
2. Measuring cups and spoons — for the soy milk, sugar, cornstarch, cocoa, butter, vanilla and salt
3. Whisk — a good one, you’ll be using it a lot so don’t grab a flimsy one
4. Medium saucepan — for warming the milk and cooking the cream
5. Heatproof spatula or wooden spoon — for scraping the bottom and edges while whisking
6. Fine mesh sieve — to press the cream through if any tiny lumps show up
7. Plastic wrap or cling film — to press right onto the surface so a skin doesn’t form
8. Shallow pan or baking dish — optional but great for quick cooling
9. Electric hand mixer or hand whisk — for a quick 10–20 second whip before piping
10. Piping bag and tip or spoon — to fill tarts, donuts, pies or whatever you’re using it on
Ingredients
-
2 cups unsweetened soy milk
-
1/3 cup granulated sugar
-
1/4 cup cornstarch
-
1/4 cup unsweetened cocoa powder
-
2 tablespoons vegan butter
-
1 teaspoon vanilla extract
-
1/8 teaspoon fine sea salt
Directions
- In a medium bowl whisk together 1/3 cup granulated sugar, 1/4 cup cornstarch, 1/4 cup unsweetened cocoa powder and 1/8 teaspoon fine sea salt until no lumps remain.
- Pour 2 cups unsweetened soy milk into a saucepan and warm over medium heat just until it starts to steam and small bubbles form around the edge, don’t let it boil.
- Slowly pour about a quarter of the hot soy milk into the dry mix while whisking constantly to make a smooth slurry, then whisk in another quarter. This tempers the starch so it won’t clump.
- Pour the slurry back into the saucepan with the remaining milk and return to medium heat. Whisk constantly, scraping the bottom and edges, until the mixture thickens and comes to a gentle simmer, about 1 to 2 minutes once it starts bubbling.
- Keep whisking for 30 to 60 seconds after simmering so the cornstarch cooks through and the cream becomes glossy and smooth. If you see any tiny lumps, press the mixture through a fine mesh sieve right away.
- Remove from heat and stir in 2 tablespoons vegan butter and 1 teaspoon vanilla extract until fully melted and incorporated. Taste and adjust salt if needed.
- Transfer the pastry cream to a bowl and press plastic wrap directly onto the surface to stop a skin forming. If you want to cool it fast, spread it into a shallow pan then cover.
- Chill in the refrigerator at least 1 hour until firm enough to pipe. For quicker use you can cool in the fridge 30 minutes and briefly whisk before piping to loosen.
- To use, whip briefly with a whisk or electric mixer for 10 to 20 seconds to restore silkiness, then pipe or spoon into tarts, cakes, doughnuts or pies. It holds its shape well when piped.
- Leftovers keep covered in the fridge for up to 4 days. If it thickens too much, stir in a tablespoon of soy milk at a time to loosen before using.
Notes
- Below you’ll find my best estimate of this recipe’s nutrition facts. Treat the numbers as a guide rather than a rule—great food should nourish both body and spirit. Figures are approximate, and the website owner assumes no liability for any inaccuracies in this recipe.
Nutrition Facts
- Serving Size: 159g
- Total number of serves: 4
- Calories: 204kcal
- Fat: 8.4g
- Saturated Fat: 1.7g
- Trans Fat: 0g
- Polyunsaturated: 1.25g
- Monounsaturated: 2.5g
- Cholesterol: 0mg
- Sodium: 164mg
- Potassium: 208mg
- Carbohydrates: 28.3g
- Fiber: 2g
- Sugar: 18.3g
- Protein: 4.3g
- Vitamin A: 250IU
- Vitamin C: 0mg
- Calcium: 160mg
- Iron: 1.5mg